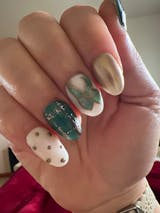
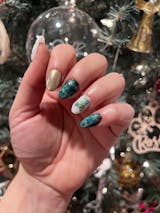
Builder Gel Information
Builder gel is a thicker consistency product that is perfect for protecting your natural nails! It works great underneath dip powder and alongside with peel base. If you accidentally get builder gel on your skin during application, be sure to remove it before curing. While applying builder gel gravity is your friend! If you flip your hand palm facing up (before curing), it can help the gel to form a natural apex. To remove the builder gel, it is best to file down the product as much as possible before soaking it off.
Builder Gel Instructions
Step 1: File nails to desired length and shape.
Step 2: Push back and remove any cuticle on the nail plate.
Step 3: Gently buff the nail to remove the shine. Brush off excess dust.
Step 4: Cleanse the nails with rubbing alcohol or dehydrator.
Step 5: Apply Acid-Free Bond (optional - for longer wear time and adhesion).
Step 6: Apply a full layer of Gel Base Coat, cure for 60 sec.
Step 7: Apply a thin, full coverage layer of builder gel. TIP: Flip hand palm side up for a few seconds so the gel can self-level to form an apex.
Step 8: Cure for 60 sec.
Step 9: Apply a thin, full coverage layer of builder gel. TIP: Flip hand palm side up for a few seconds so the gel can self-level to form an apex.
Step 10: Cure for 60 sec. (repeat steps 9 and 10 until you reach your desired thickness)
Step 11: Cleanse the nail with rubbing alcohol and a lint free wipe.
Step 12: File, shape, and buff the nail. Brush off excess dust.
Step 13: Cleanse the nail with rubbing alcohol and a lint free wipe.
Step 14: Apply a full layer of Gel Base Coat, cure for 30 sec. Follow up with a full layer of Gel Top Coat, cure for 60 sec.
Step 15: Apply cuticle oil, if desired.
Step 16: Admire your beautiful manicure!
TIP: At this point, you can apply peel base OR use dip powder right on top!
Builder Gel Apex Instructions
Step 1: File nails to desired length and shape.
Step 2: Push back and remove any cuticle on the nail plate.
Step 3: Gently buff the nail to remove the shine. Brush off excess dust.
Step 4: Cleanse the nails with rubbing alcohol or dehydrator.
Step 5: Apply Acid-Free Bond (optional - for longer wear time and adhesion).
Step 6: Apply a full layer of 2-in-1 Gel Base and Top Coat, cure for 60 sec. *If you do not have the 2 in 1, apply a gel base and cure for 60 sec.
Step 7: Apply a thin, full coverage layer of builder gel. TIP: Flip hand palm side up for a few seconds so the gel can self-level to form an apex.
Step 8: Cure for 60 sec.
Step 9: Apply a thin, full coverage layer of builder gel. *DO NOT CURE YET
Step 10: Apply a thin bead of builder gel down the center of the nail. TIP: Flip hand palm side up for a few seconds so the gel can self-level to form an apex.
Step 11: Cure for 60 sec.
Step 12: Cleanse the nail with rubbing alcohol and a lint free wipe.
Step 13: File, shape, and buff the nail. Brush off excess dust.
Step 14: Cleanse the nail with rubbing alcohol and a lint free wipe.
Step 15: Apply a full layer of 2-in-1 Gel Base and Top Coat, cure for 60 sec. *If you do not have the 2 in 1, apply a gel top coat and cure for 60 sec.
Step 16: Cleanse the nail with rubbing alcohol and a lint free wipe.
Step 17: Admire your beautiful manicure!
TIP: At this point, you can apply peel base OR use dip powder right on top!


